
Tuesday, August 31, 2010
Garbage Gratitude
I am so so thankful to Colin's Dad, Uncle Jim (no the same electrician one, we are blessed to have multiple Uncle Jims), and a great friend of the family Jeff. Why am I so thankful? Because they came and took a ton of my remodel trash away. I came home from work and my pile shown below was gone!
 Wow what a a pile of cr*p off my shoulders ( I mean porch).
It's a wash
Guess what happens when you get under the house to do the plumbing? You find leaks. But thankfully none of the pipes were leaking; it was our ancient washing machine. Bummer! But not too terrible because it means that I got a new washer! A wonderful energy efficient thing that the hot water actually works.
 I am not going to count it in the kitchen budget because it is not in the kitchen. That is ok right? The dryer will have to wait becasue it is not like we are laundering money.
P.S. Thanks to Tammy for letting us use her consumer reports login to get the best of the best!

P.S. Thanks to Tammy for letting us use her consumer reports login to get the best of the best!
Saturday, August 28, 2010
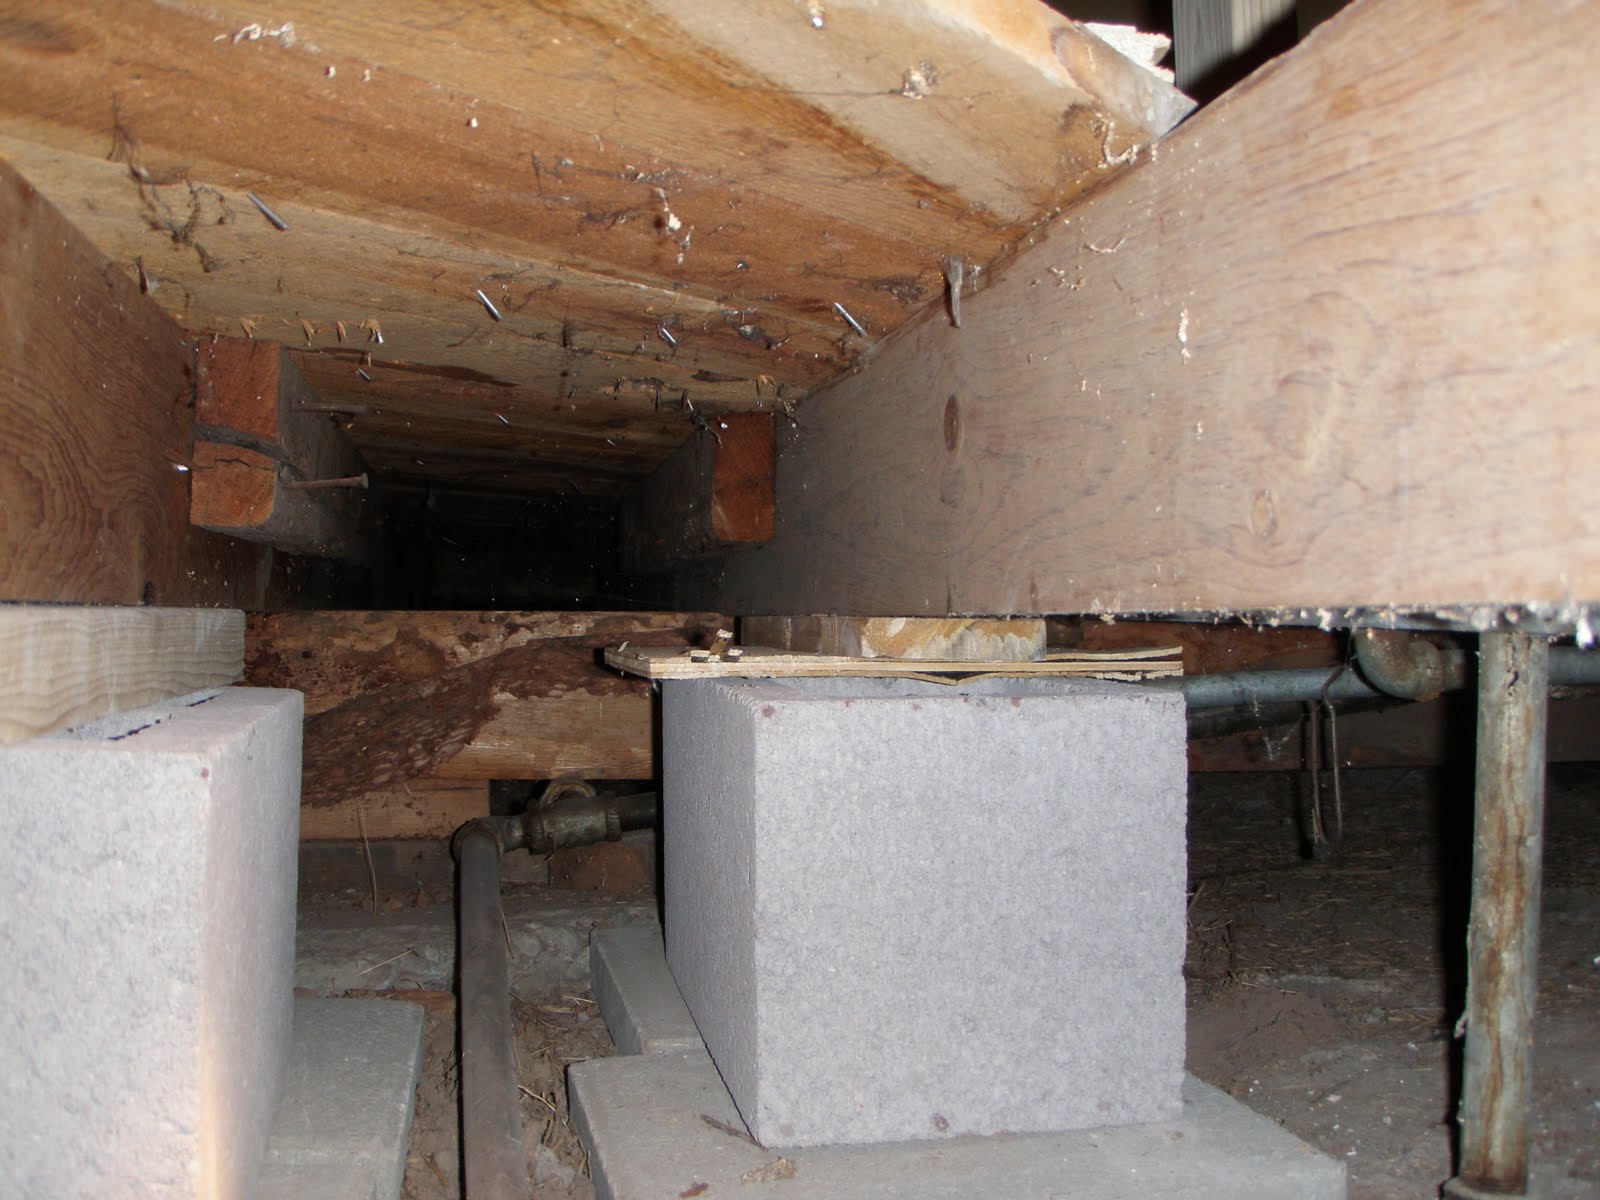
This ain't no lipstick job
Are we worry worts? Yes. We were feeling worried about our slightly sloping floor being able to support the weight of the cabinets and the concrete counter tops and the solar hot water panels on the roof and the hot water heater and the indirect hot water heater, so we ripped up some of the sub-floor to see what we could see. We could see that there needed to be some more supports. Thankfully, Colin is not scared of the creepy crawlies down there, so he got under the floor and made some cinder block supports. Now we are just going to drop in some extra water line for any future plumbing replacements (since the floor is already ripped up) and we will be all set with our re-enforced floor.
Before

After
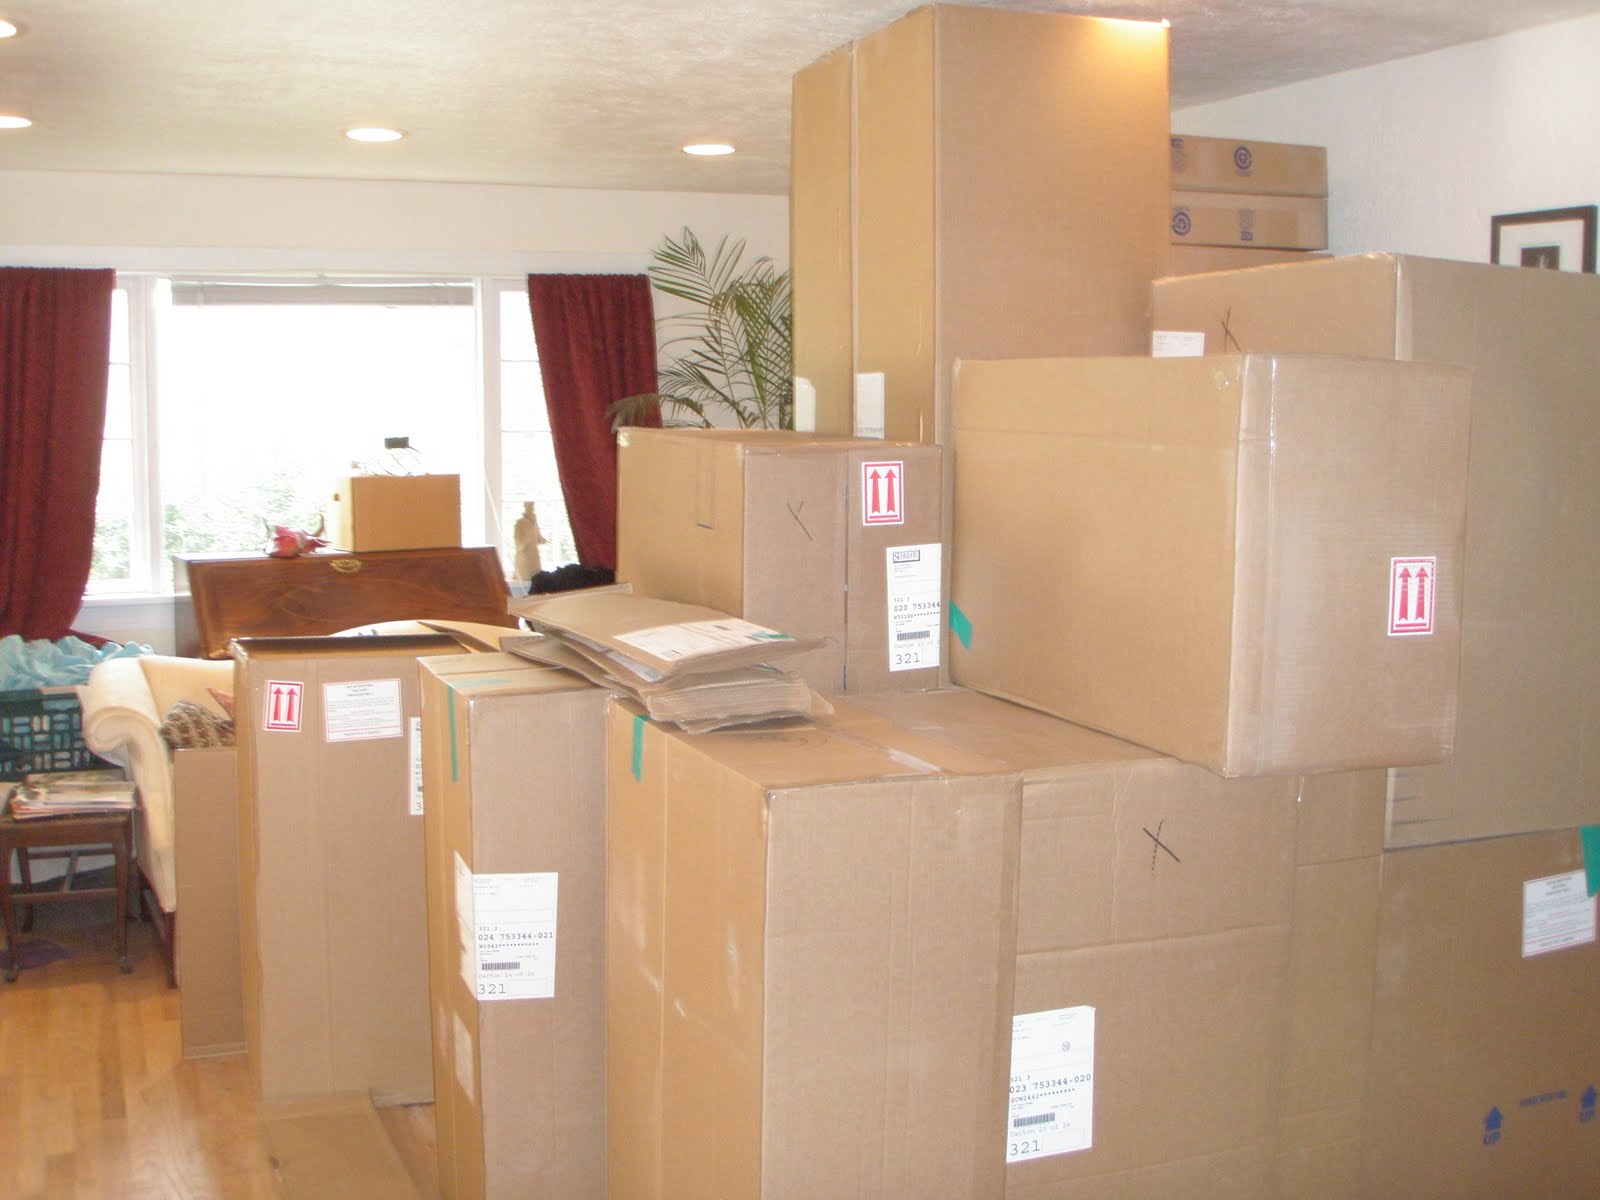
Presto Chango: a Living Room Full of Cabinets
Thanks a million to Sarah from work who got a truck and helped me move the black couch to James'. If that had not happened, the cabinets would not have fit.
The cabinet truck came in their slotted 4 hours that they had given me to wait. Which actually worked out fine because I really needed to be at home trying to get over my illness. Thank goodness I still had my floating holiday to use. So my only job was to sit on the couch and check off the boxes as they came in the front door. There were 26 boxes ranging in size from a video cassette to 8 foot tall monstrosities.
Colin and I both please with the color and the grain of the cabinets. Now we, or actually Colin, needs to get to work so that we can get the boxes into their rightful place in the kitchen.
Living room emptied/all furniture pushed to one end.


Now full of boxes.


Tuesday, August 24, 2010
PANIC
The cabinet delivery just called and said our cabinets will be delivered this Friday! Between 10 and 2. I asked if I could postpone. They said they would charge me if there is not someone there between 10 and 2 on Friday. We are not ready for cabinets. Where are we going to put them? I must get a U-Haul tonight and get the black couch to James' and move the white couch to the yoga room. Hopefully, they will all fit in there. YIKES.
How to hang your kitchen sink
So, since I thought this was best kitchen remodel idea ever. I thought I would try my hand at writing a how-to. Here it goes.
How to hang your kitchen sink:

How to hang your kitchen sink:
- Go to a hardware store and purchase 20 feet of steal cable and the clamps that go with the cable. Don't forget to get some eye bolts too.
- Come home and clear off the counter where the sink is located.
- Measure at least six inches to the left and right of the sink and place an x two inches away from the front of the counter top.
- Drill a hole large enough to fit your steal cable.
- Use a stud finder to find a stud as close to parallel to the holes you drilled in the counter as you can. Drill a hole slightly smaller than your eye bolt six inches below the ceiling on the studs.
- Screw in the eye bolt.
- Attach the cable to the eye bolts. Thread the other end of the cable though the holes in the counter. Connect the cable around the front of the counter using the clamps.
- Demolish the cabinets below the sink. If you can seperate the counter top from the cabinets and save the cabinets for ReStore that is even better.
- Enjoy having your kitchen sink for as long as possible.

This one is hung from the ceiling. But it is better to hang it from the wall if you are not planning on re-doing the drywall on the ceiling.
Saturday, August 21, 2010
The cabinet dilema
What brand? What Style? What wood? What finish? They cost HOW MUCH?
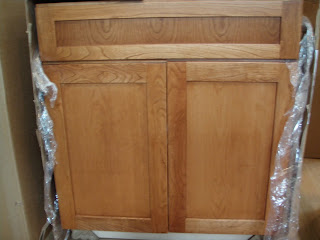
So, for no reason that I can really understand, I chose to try the process with Lowes-Schuller cabinets. Colin and I had the design down pat and I got the old Schuller book with the cabinet choices and dimensions. It was a fairly quick process for the cabinet guy (Robb) to put the design into the system and shoot out a price that I was not happy with. Had I been overly optimistic about how much cabinets cost? In short, yes. I quickly downloaded the IKEA home builder software and built a crappy version of what we wanted with major compromises and that price came out to what I had originally budgeted. So we vetoed that idea. Then we looked at the cost breakdown and the two pieces that were the most expensive were the bookcase style floor to ceiling cabinets that flanked the fridge. At 900 bucks each we figured we could find our own bookcases. So I started my Internet searching, and in-town searching, and brain racking DIY searching, and turned up EXPENSIVE everywhere. So we decided it was worth it to have them match the cabinets.
So we bought the Sugar Cherry with the Pecan finish at Lowes. We were able to get them for $7530.00 plus tax. I was ok with that, I just told Colin that we had to buckle down in other places to make them worth it. If you would like to see the cost breakdown of each cabinet leave a comment and I will send it along.
 This is close to what we will have.
 Friday, August 20, 2010
The floor plan
_Page_1.jpg)
_Page_2.jpg)
_Page_3.jpg)
A few things have changed since we made these but it will give you a better idea of what we are envisioning.

Wednesday, August 18, 2010
I feel like Thomas Edison!
I am very proud to say that I did the electrical in the living room ALL BY MYSELF! I ran new electrical cable through the wall and out to the outside for light next to the new front door. I ran electrical cable under the floor for the two outlets on that side of the living room wall. I wired up the light out side. I wired up the switch and the power to the outlets. And it worked! I did it! Well, except that I installed the switch upside down. But I fixed it don't worry. I spent time waiting for my coffee to brew by flipping the light on and off. On and off. On and off. And marveling at the new skills I am learning. Maybe I should become a journey-woman.
Tuesday, August 17, 2010
Where the money at...
So I mentioned my budget once before, but I thought I might give you a quick break down of what things are costing us. Please keep in mind that we are doing all the work ourselves or getting it free from relatives. We are paying handy James to help us speed the process along. So here is the break down so far:
There is a lot that I am leaving off the list because I am anticipating more expenditures in those categories. As of right now we have spent 69.97% of our budget. I would say we are right on track! (hopefully) I promise to give you the final-final number when everything is completed.
- Demo: free
- Water heater energy star $350
- Indirect water heater - used from restore $300
- Hot water solar panels $50 bucks from craigslist
- Red oak floors $489 ( this does not include the polyurethane
- Living room door $500
- Schuler cherry cabinets $8000 with tax ( tax was a lot!)
- Tools to complete all this work $1000
- Kitchen door $316
- Dog door $147 (remember it is a fancy one)
- Hardware for cabinets $70
- Mechanical room door $270
- Light fixtures so far $42 from ReStore
- Insulation $200
- Dishwasher $740 with delivery (this is the consumer reports best buy)
- Faucet $117
There is a lot that I am leaving off the list because I am anticipating more expenditures in those categories. As of right now we have spent 69.97% of our budget. I would say we are right on track! (hopefully) I promise to give you the final-final number when everything is completed.
Monday, August 16, 2010
Weekend warriors
I felt like we were supper productive this weekend. Thanks in part to James and in part to "Let's get this done already" attitudes. What did we do you ask? Well let me tell you:


- We took back the wrong water heater
- Picked up the new water heater
- Picked up the big door- and I mean big (more that later)
- Installed the front door
- Added two trusses to the ceiling to support the solar hot water panels
- Installed 90% of the insulation in the ceiling and walls of the kitchen
- Ripped a huge hole in the wall for the big door
- Ripped out a section of floor to replace the rotten sub-floor
- Made crepes on the grill-since the stove in now out of commission (Colin keeps asking if I want it temporarily hooked back up, isn't he sweet)
- Found an awesome skink -no, not sink, skink.
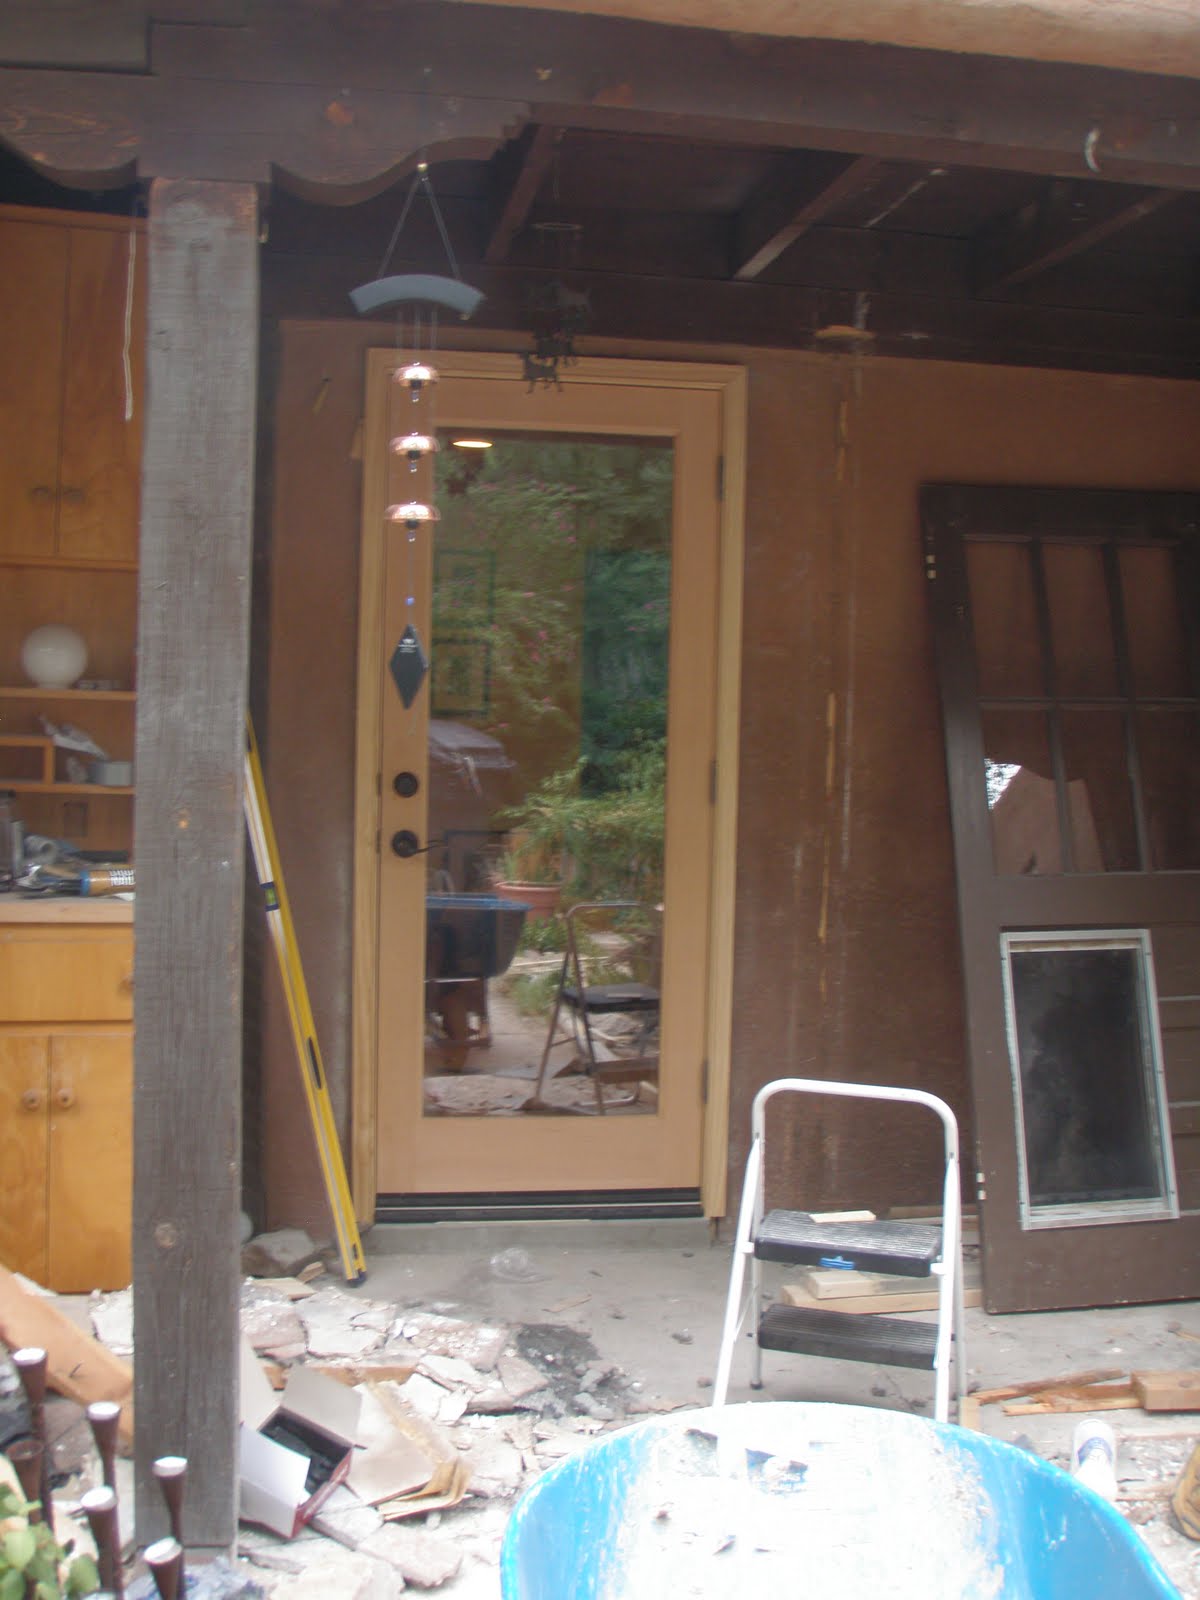
Front door (notice the old one to the right)

Insulation

Big door leaning on the car to keep out of the rain

Hole in the floor

Hole in the wall (not yet a big enough hole for the big door)

Great Plains Skink (baby)
This older-than-we-thought house
We originally though the house was built in 1962. This information came from the seller and the inspector thought that was about right. They were wrong, wrong, wrong. This weekend as we pulled up some of the floor in the kitchen to replace a rotten sub-floor board we found some newspaper that had been used as underlayment. The date on the paper was.... 1947! And the really cool part is the section we pulled up was the for sale section. There was a house near ours in the ad that was selling for $4,500! And the big selling point of most of the houses on the page were that they were on paved roads. I was so excited by finding some history with the house!

Here is a little bit of the really old newspaper that was in my really old house.
Friday, August 13, 2010
Who is the gas king? ( I am not talking about farting)
Colin is! He is both brave and skilled. He decided that he was up to the challenge of doing the gas plumbing for the new hot water heater. And the amazing part....He did it! Funny how I am not scared of the electrical anymore but that I am SCARED of the gas plumbing. Just another reason why we make a good team. Speaking of teamwork, I have felt like I have not been pulling my weight with being sick and all, so last night as Colin plumbed (is that the right way to say that?) I read Beatrice and Virgil to him. Seems there is only one thing that I love more than remodeling my kitchen and that is reading a good book. We got through the first 100 pages and then decided it was time for bed. I should have remembered that Restore was coming in the morning to pick up some of the cabinets and whatnot that we had taken out of the old and ugly kitchen - but I did not. So in the morning Colin and I were scrambling to get everything out to the curb. I even made a hasty sign that said, FOR RESTORE and since I love parenthesis ( if you are not ReStore, please do not take). If getting the plumbing done, reading half a novel, getting rid of trash, and helping those in need in less that 12 hours is not productivity at its finest, I don't know what is!

Thanks Colin -for being a great plumber (with the cutest plumbers butt around).
Wednesday, August 11, 2010
Some pics to tide you over
New front door- unstained - not installed - but oh so pretty. Just imagine it for now and I will post the progress on that front as soon as there is any. 

Concrete threshhold - look close - it says Brittany and Colin 2010 (Colin wrote that!) A funny story about Colin and sleep walking/talking. We had talked the night before about the threshhold and then in the middle of the night I woke up to Colin crawing all over the bed and lighting up the ground with his phone. I asked what he was doing and he said, "Searching for threshholds." I asked if he was asleep and he said, "No!" but he was. And it was hilarious!
The electrical box with four new breakers ( the ones on the right side)! Uncle Jim taught me how to do it. It was not as scary as I expected. Grounds all go to one place, neutrals all go to one place, and hots go into the breakers. Make it look pretty and keep everything nice and tidy. Too bad I broke out an extra slot for the breaks on the cover. That is an easy fix though- a dummy breaker will take that spot. 
Tuesday, August 10, 2010
Sickness contributing to the slow down
Remember how I said we were entering the slow phase? Well it is even slower becasue I have fallen ill. I promise to write mroe soon but try to be patient with me while I rest up a bit.
A quick list of items completed by Colin, Uncle Jim, and James:
Electrical box and outside conduit
Ship shaping the hole in the wall to make the door plumb and square
Electrical for outside lights
Water heater picked up ( wrong one though so we will have to exchange it)
New glass door picked up ( boy does it make the living room look different
Went to get the mechanical room door but it was not yet ready
Colin got the trusses to give the roof some more support for the hot water panels
I promise I will take some pics to post tomorrow.
Thursday, August 5, 2010
Tick, tick, tick, tick, tick

No, that is not the sound of me worrying about how long the remodel is taking. It is the idea of a time capsule emerging. Colin and I decided to make a time capsule and place it in the wall before we seal everything up with drywall. I am thinking to place everything in a disposable tupperware. I have an old cell phone, a print out of the blog, the names of all our help, a newspaper clipping, and.... you fill in the blank. Leave a comment about what you think would be a great item to include. Best idea will be featured in a future post.
Guest post by my awesome DIY mom
Hey Brit, Maybe you could get your kitchen finished sooner if you made it out of foam core like I made this one for the girls [her gandbabies]! Just kidding, but isn't this cute? Hoping this will keep them busy enough that they won't be frustrated by the baby latches in the "big kitchen." I found this idea on the internet when I did a search for DIY toy kitchen.


Tuesday, August 3, 2010
Let's really start fresh
Are we glutton for punishment? Seems so! This weekend we decided that we were going to "start fresh". What exactly does this mean? Well, we decided to gut the kitchen in its entirety. Thankfully, we had the help of Colin's uncle Jim, Colin's mom and dad, and our trusty friend James! In one day we ripped all the drywall out of the walls and ceiling. And took out all the millions of nails in the 2 x 4s and then, the big part, we cleaned it all up. This enabled us to rough in the electrical (still quite a bit of work to do there.) All in all, I would say that we are now 95% finished with demo. Now comes the hard and very slow part. Wish us luck, we certainly need it.


Monday, August 2, 2010
Cardboard for visioning
The other day I asked Colin something about how the kitchen was going to look and he said that he could not really imagine it. I was astounded as I have had a vision of this kitchen etched in my brain, day and night, since we began planning. So thanks to a post on http://blog.imaginaryfoundation.com/ I decided to make a life size kitchen out of cardboard so that Colin could envision the kitchen just like me. Turns out our design was much better than either of us thought. Colin loved the cardboard bar that I made so much that he almost forgot that it was not real and was about to put his dinner down on it when I yelled out to stop him.

Being green: not only did we reuse the cardboard from the packaging of the dewalt tools, we then recycled it.
% Complete: 100% if you live in the land of pretend.
Budget spent: free cardboard box with the purchase of $500 worth of tools, left over paper from covering the floor- perhaps $2.00 worth. I would say that is one cheap remodel. Too bad it is too flimsy to keep. 
Subscribe to:
Posts (Atom)